Choosing the Right Materials:
Before diving into the soundproofing process, it's essential to gather the necessary materials. Here's what you'll need:
Mass-loaded vinyl (MLV)
Acoustic sealant
Soundproof underlayment
Green Glue
Carpet or rug (optional)
Foam panels or acoustic tiles (optional)
Enjoying the Results:
Once you're satisfied with the soundproofing between floors, take some time to enjoy the newfound peace in your home. Whether you're working, relaxing, or sleeping, you can now do so without being disturbed by unwanted noise from above or below.
Assessing the Current Situation:
Start by evaluating the existing structure of your floors. Identify any gaps, cracks, or openings where sound may be traveling through. Additionally, take note of the type of flooring you have and whether any modifications will be needed to accommodate the soundproofing materials.
Preparing the Surface:
Before applying any soundproofing materials, ensure that the surface between floors is clean and free of debris. Use a vacuum or broom to remove any dust or dirt, and wipe down the area with a damp cloth if necessary. This will help ensure optimal adhesion for the soundproofing products.
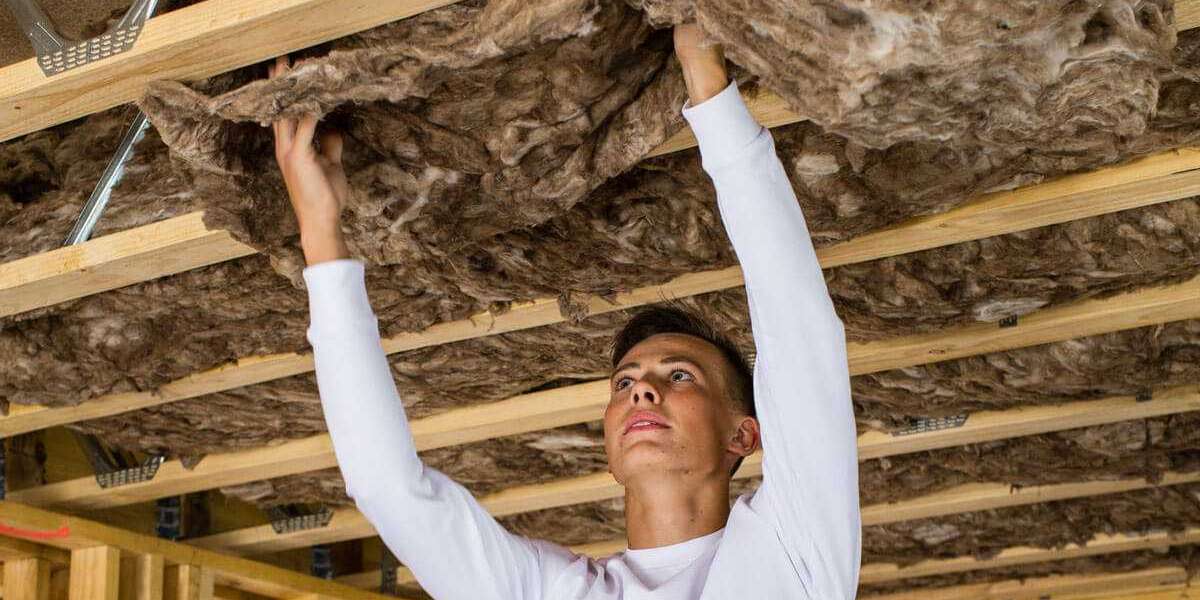
Installing Mass-Loaded Vinyl (MLV):
Mass-loaded vinyl (MLV) is a dense, flexible material that effectively blocks airborne sound transmission. Begin by cutting the MLV to the appropriate size to fit the area between floors. Apply the MLV directly to the ceiling of the lower floor using adhesive or staples, ensuring that it is securely attached and covers the entire surface.
Applying Acoustic Sealant:
To further seal any gaps or cracks, apply acoustic sealant around the edges of the MLV and along seams where different materials meet. This will create an airtight barrier, preventing sound from leaking through gaps in the soundproofing layers.
Installing Soundproof Underlayment:
Soundproof underlayment is another effective way to reduce impact noise, such as footsteps or furniture movement. Lay the soundproof underlayment on top of the existing flooring, making sure to cover the entire surface area. Secure the underlayment in place using adhesive or tape, ensuring a tight seal around the edges.
Applying Green Glue:
Green Glue is a viscoelastic compound that converts sound energy into heat, effectively dampening vibrations and reducing noise transmission. Apply Green Glue to the underside of the flooring material, then press it firmly into place. For best results, use a generous amount of Green Glue and ensure that the entire surface is covered.
Finishing Touches:
Once the soundproofing materials are installed, you can add additional finishing touches to further enhance the acoustics of the room. Consider adding a carpet or rug to the floor surface, as this can help absorb sound and reduce reverberations. You may also want to install foam panels or acoustic tiles on the walls to further minimize sound reflections.
Testing for Effectiveness:
After completing the soundproofing process, it's essential to test its effectiveness. Play music or generate noise on the upper floor, and listen for any noticeable reduction in sound transmission to the lower floor. Adjust as needed to achieve the desired level of soundproofing between floors.
Final Thoughts:
Soundproofing between floors is a practical and cost-effective way to improve the acoustics of your home and create a more peaceful living environment. By following this step-by-step DIY tutorial, you can effectively reduce airborne and impact noise, allowing you to enjoy greater comfort and tranquility in your daily life. So why wait? Get started on your soundproofing project today and experience the benefits for yourself.