How to Draw Angel Wings. Angels play a major role in various cultures, religions, and myths around the world. These celestial beings are considered guardians and comforters and are often associated with holidays like Christmas.
Also, check our Free Lizard Coloring Pages.
Angels also abound in various art forms, from classic Renaissance paintings to depictions in film and literature.
These different depictions have created a common depiction of angels as majestic beings with large wings.
This last element can be particularly difficult, and many people wonder how to draw angel wings.
With this step-by-step guide to drawing angel wings, you'll be creating your own beautiful angels in no time!
How to Draw Angel Wings
Step 1
In the first step of this guide to drawing angel wings, we'll start by outlining the wings.
When drawing these angel wings, try to imagine them as big dove wings. To start drawing, draw rounded, curved lines with sharp points at the end to start creating the outlines of the angel wings.
If you find this step difficult, you can use a pencil for now, carefully following the reference image. When you're happy with that, you can then go over it with a pen!
Step 2
Wings always look better and more effective with feathers, so let's add some to your angel wing design in this next step! To do this, you can continue to add to the outlines you drew in the previous step.
The feathers will curve a lot inside the wings, as you can see in the reference image. When drawing the feathers for the two wings, be careful to keep them as symmetrical as possible.
Step 3
You are now getting to know the feather part of your drawing, so we will add more in the next step of our guide on how to draw angel wings.
Just draw two more feathers on each wing using some of the curved lines you drew.
There should only be a small empty space at the bottom, which we'll fill in shortly.
Step 4
We mentioned the empty space at the bottom of the wings in the previous step, and as promised, we will fill it in for this part of the angel wing design!
Just draw two more curved lines to add the final rows of flowers to the wings. Once you've filled in all the feathers, you're ready for the final details!
Step 5
Before we get into the colors to draw your angel wings, we need to add a few more details about the inside of the wings.
Draw a curved line inside the wings and then add some small curved lines underneath for an even featherier effect.
And with that, you are ready for the next level! Before you do that, though, be sure to add any extra detail you want to your drawing!
If you are particularly creative, you can draw the angel's body between the wings. Another way to personalize this design would be to create a nice background.
It could be some big puffy golden clouds as a background for your angel wings!
Step 6
Now that you've completed your angel wings added the final details, and added as many elements as you like, you're ready to sit back and have some coloring fun!
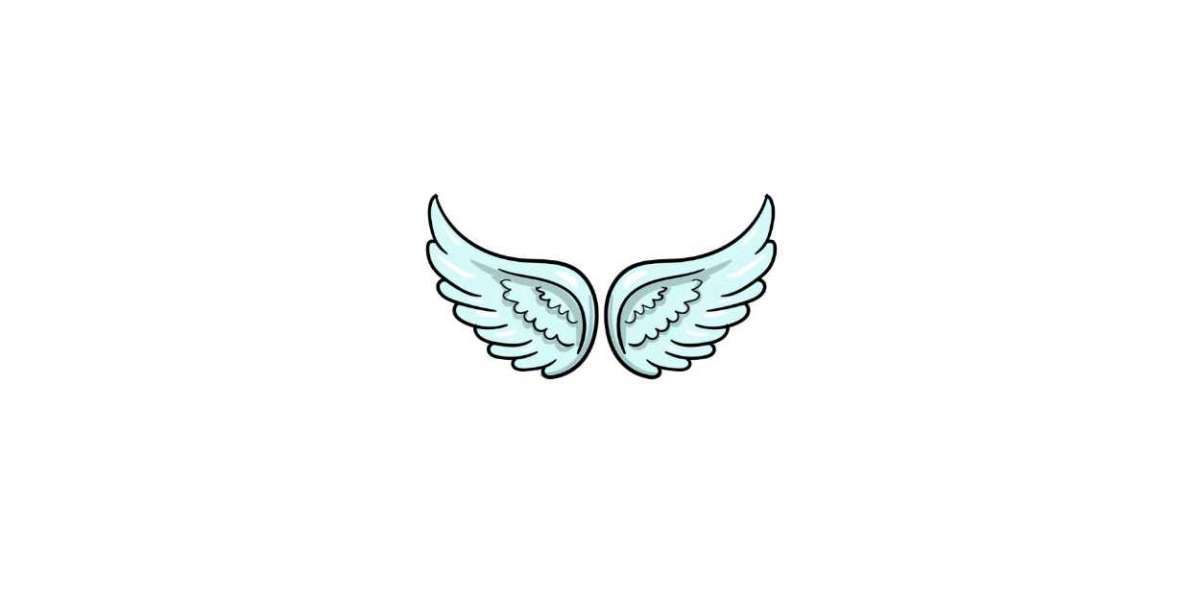
For the wings in our reference image, we used a nice, soft blue. However, for this step, you should use whatever colors you like. This is your drawing, so how you finish it is up to you!
You could go for a nice light gold and yellow for this image, keeping the colors a little more muted or opting for bright rainbow colors to really make it stand out.
These are just a few of the many ideas you can try. So let your imagination run wild!
When coloring in, remember that choosing colors is only half the battle. You can also add beautiful looks and styles to your drawing with the artistic mediums you use.
If you want a bright look, you can use acrylic paints or colored pencils to bring out the colors! If you prefer a more subtle look, watercolor or colored pencils are the right choice.
Your Angel Wings Drawing is Finished!